如何在Vultr上将服务器端加密 (SSE-C)与 S3 对象存储结合使用
介绍
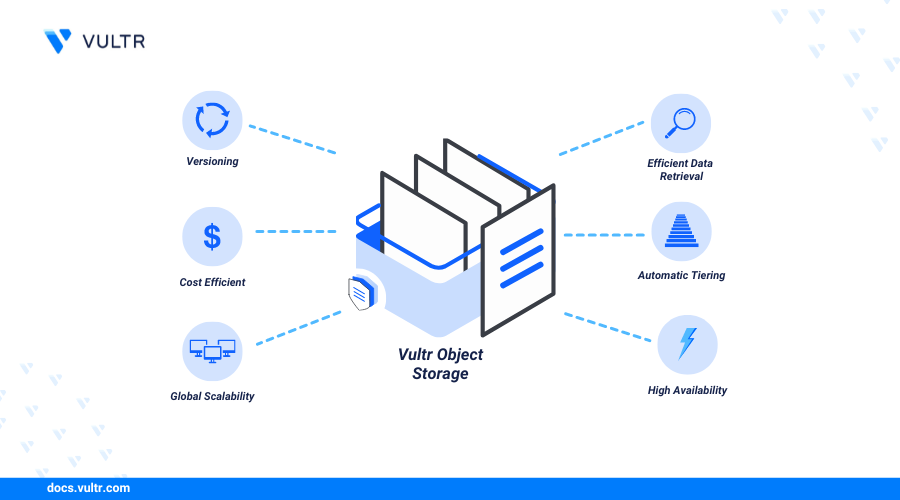
对象存储与服务器端加密 (SSE-C) 相结合,为在云中安全地存储和管理数据提供了强大的解决方案。Vultr 的对象存储服务为存储大量非结构化数据(如媒体文件、备份和存档)提供了一个可靠的平台。SSE-C(使用客户提供的密钥的服务器端加密)允许用户提供自己的加密密钥,云服务提供商在存储数据之前使用该加密密钥在服务器端加密数据。这确保了数据在其整个生命周期内保持机密和安全,
本文将指导您完成在 Vultr 上设置 Ubuntu 服务器、配置 Vultr 对象存储以及利用 SSE-C 上传和下载加密对象的过程。
使用具有客户提供的密钥 (SSE-C) 的服务器端加密时,客户全权负责管理和保护其加密密钥。使用 SSE-C 即表示您承认您了解这些责任以及丢失加密密钥的潜在后果。
-
先决条件
准备工作:
- 在 Vultr 上部署 Ubuntu 24.04 服务器实例。
- 部署 Vultr S3 对象存储并创建存储桶。
- 以具有 sudo 权限的非 root 用户身份使用 SSH 访问服务器。
- 更新服务器。
使用 SSE-C 通过 AWS CLI 上传和下载对象
在本节中,您将学习如何在 Vultr 对象存储上使用客户端加密和客户提供的密钥 (SSE-C) 安全地上传和下载对象。您将按照以下步骤设置依赖项、配置 AWS CLI、使用 AWS CLI 上传和下载对象,以及 .s3 cpput-objectget-object
- 安装依赖项。
openssl$ sudo apt-get install openssl - 生成一个随机的 32 字节加密密钥。
$ openssl rand -out encryption_key.bin 32
生成的密钥将存储在名为 的文件中。
encryption_key.bin - 创建一个新的文本文件以将其上传到 S3 存储桶。
$ nano sample.txt - 复制并粘贴以下文本。
This is a sample file that will be uploaded to the S3 bucket.保存并关闭文件。
- 下载 AWS CLI 安装文件。
$ curl "https://awscli.amazonaws.com/awscli-exe-linux-x86_64.zip" -o "awscliv2.zip"
- 解压缩安装文件。
$ unzip awscliv2.zip - 运行安装程序。
$ sudo ./aws/install - 验证安装。
$ aws --version - 配置 AWS CLI。
$ aws configure --profile vultr_ewr按照提示操作,并提供访问密钥和密钥以及默认来源。
- 使用 AWS CLI 上传对象。
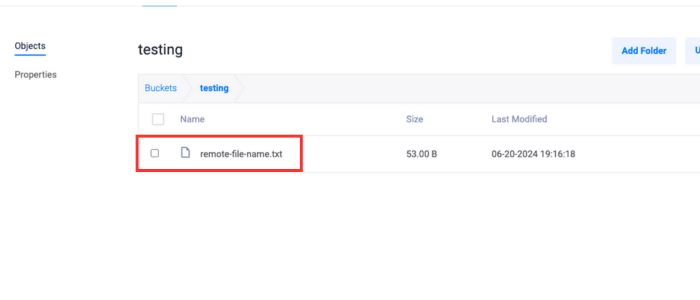
s3 cp$ aws --endpoint-url https://<vultr endpoint>.com --profile vultr_ewr s3 cp /path/to/local/sample.txt s3://your-bucket-name/remote-file-name.txt --sse-c AES256 --sse-c-key fileb://encryption_key.bin确保满足以下条件:
- 替换为实际的 Vultr 对象存储端点。
<vultr endpoint> - 替换为您的实际存储桶名称。
<your-bucket-name> - 替换为要上传的本地文件的路径。
/path/to/local/sample.txt
确认文件已上传到存储桶。
- 替换为实际的 Vultr 对象存储端点。
- 使用 AWS CLI 下载对象。
s3 cp$ aws --endpoint-url https://<vultr endpoint>.com --profile vultr_ewr s3 cp s3://your-bucket-name/remote-file-name.txt /path/to/local/download.txt --sse-c AES256 --sse-c-key fileb://encryption_key.bin替换为下载文件所需的本地路径。
/path/to/local/download.txt - 使用 AWS CLI 上传对象。
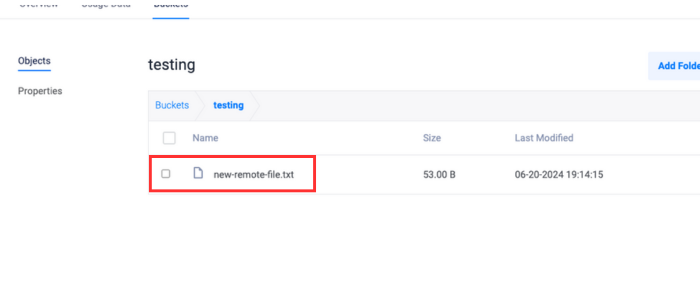
put-object$ aws --endpoint-url https://<vultr endpoint>.com --profile vultr_ewr s3api put-object --bucket your-bucket-name --key new-remote-file.txt --body /path/to/local/sample.txt --sse-customer-algorithm AES256 --sse-customer-key fileb://encryption_key.bin确认文件已上传到存储桶。
- 使用 AWS CLI 下载对象。
get-object$ aws --endpoint-url https://<vultr endpoint>.com --profile vultr_ewr s3api get-object --bucket your-bucket-name --key new-remote-file.txt /path/to/local/download.txt --sse-customer-algorithm AES256 --sse-customer-key fileb://s3_enc.key
使用 SSE-C 上传和下载对象
在本节中,你将按照步骤设置依赖项、配置环境变量,并使用 Python 脚本进行自动加密、上传、下载和解密过程。
- 安装依赖项。
boto3$ sudo apt install python3-boto3 - 为 S3 存储桶凭证创建环境变量。
$ export AWS_ACCESS_KEY_ID=<your_access_key>
$ export AWS_SECRET_ACCESS_KEY=<your_secret_key>
创建用于上传和下载文件的 Python 脚本
- 创建新的 Python 文件。
$ nano vultr_object_storage_sse_c.py - 导入依赖项和环境变量。
import os
import boto3
import subprocess
- 在 Python 文件中,为加密密钥文件创建常量并检索 S3 凭证。
KEY_FILE = "encryption_key.bin"

access_key = os.environ.get("AWS_ACCESS_KEY_ID")
secret_key = os.environ.get("AWS_SECRET_ACCESS_KEY")
- 在 Python 文件中,如果尚未存在加密密钥,请生成加密密钥,否则从文件中读取加密密钥。
if not os.path.exists(KEY_FILE):
    openssl_cmd = ["openssl", "rand", "-out", KEY_FILE, "32"]
    subprocess.check_call(openssl_cmd)

with open(KEY_FILE, "rb") as f:
ENCRYPTION_KEY = f.read()
- 在 Python 文件中,定义加密算法和 S3 详细信息并读取本地文件内容。
ALGO = "AES256"
BUCKET = "<bucket_name>"
FILE = "sample.txt"
LOCAL_FILE_PATH = "path/to/sample.txt"

with open(LOCAL_FILE_PATH, "rb") as file:
    file_content = file.read()
- 在 Python 文件中,初始化 S3 的 Boto3 客户端。
client = boto3.client(
    "s3",
    aws_access_key_id=access_key,
    aws_secret_access_key=secret_key,
    endpoint_url="http://<your_s3_endpoint_url>",
)
- 在 Python 文件中,使用客户提供的密钥 (SSE-C) 通过服务器端加密将文件上传到 S3。
print("Uploading file to Vultr Object Storage with SSE-C...")
client.put_object(
    SSECustomerKey=ENCRYPTION_KEY,
    SSECustomerAlgorithm=ALGO,
    Bucket=BUCKET,
    Key=FILE,
    Body=file_content,
)
print("Upload successful.")
- 在 Python 文件中,下载并解密加密文件。
print("Downloading the encrypted file...")
response = client.get_object(
    SSECustomerKey=ENCRYPTION_KEY,
    SSECustomerAlgorithm=ALGO,
    Bucket=BUCKET,
    Key=FILE,
)

decrypted_content = response["Body"].read().decode("utf-8")
print("Decrypted content:", decrypted_content)
保存并关闭文件。
- 运行 Python 脚本。
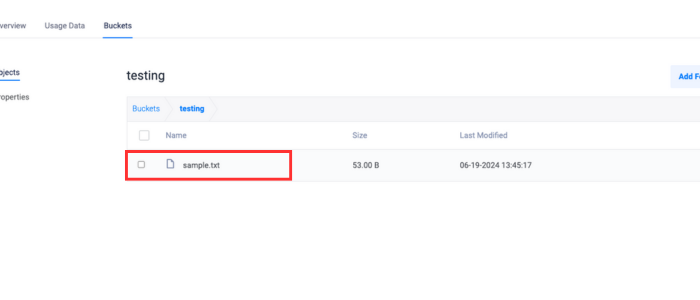
$ python3 vultr_object_storage_sse_c.py - 确认上传的文件是否存在于 Vultr 仪表板中。
结论
在本文中,您学习了如何在 Vultr 对象存储上有效地利用具有客户提供密钥的服务器端加密 (SSE-C)。按照上述步骤操作,您已成功在 Vultr 上设置 Ubuntu 服务器,配置对象存储,并实施 SSE-C 以安全地上传和下载加密对象。


